
In this article we will explain how to configure a NFC Tag. After configuring when the NFC tag is tapped by any phone it will open your contact details in the receiver's phone.
Unbox the Tag
Unbox the tag from the packing which you received. Do not peel the sticker yet, the tag needs to be configured before you can stick it.
Create Contact Profile
You will need the Pocket vCard app (it's Free) to write the contact data to the NFC tag. If you have not downloaded the app yet please proceed to download from Apple AppStore or Google PlayStore for Free.
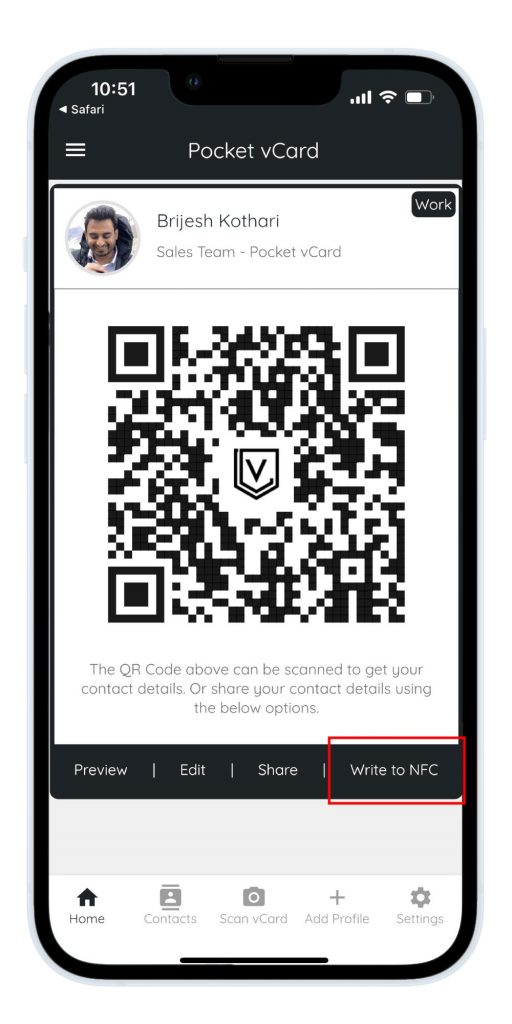
Create a Profile on the Pocket vCard app and you will see the Write to NFC button as shown in the screenshot.
NOTE : If you do not see the Write to NFC button please make sure NFC is enabled from your Phone Settings. After you enable NFC please close the app and open again.
Write to NFC Tag
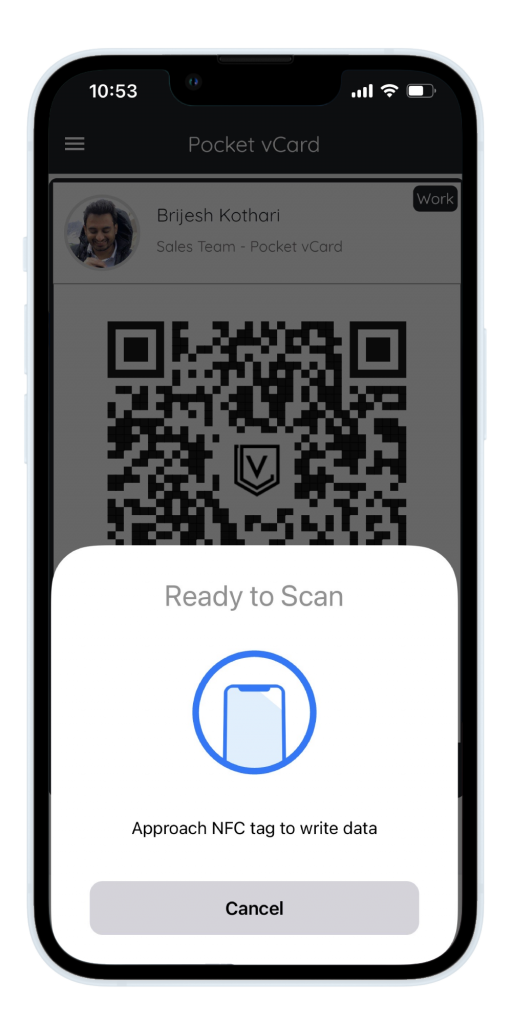
Tap on the Write to NFC button under the profile you would like to add to the tag. It will show a popup as shown in the screenshot.
When the popup appears please place the NFC Tag (that you received) on the back of your phone where you have NFC reader (generally at the top of your phone). Hold it for 3 seconds. The app will show a success message when the data is written to the tag.
Stick the NFC Tag
Now you can peel the sticker from the back of your NFC tag and stick it on the back of your phone or any other place you plan to use the NFC tag. Press it firmly for 5-10 seconds and let it remain for some time.
That's it your NFC Tag is now ready for use.
You can share your contact by just tapping your NFC tag on the back of your phone to the receiver's phone NFC reader and they will receive your contact details.
Note: Once the tag is stuck do not remove it as it will not stick again.
Note: When you want to remove the tag you can simply pull it and it will not leave any marks on your phone.
For any questions contact us at [email protected]